
Dear customer, Thank you for purchasing IDEA StatiCa. We hope that together with your talented work team, it will enable you to achieve great projects in steel and concrete structure design.
The purpose of this article is to help you take the first steps in activating your license so you can start working and generating projects within minutes. Therefore, we will proceed to activate your account.
Administrator User Activation
Before downloading the IDEA StatiCa software, it is important to have your administrator user configured. For this, the manufacturer IDEA StatiCa will have created a user for you, which is the email address you provided to our administrative team.
If you are unsure about your administrator user, don’t worry. Create a ticket on our Zendesk platform requesting the username, and we will gladly provide this information.
If you already know your administrator user, we will proceed with its activation. Please visit the following link.
https://auth.ideastatica.com/Account/ActivatePassword
When you access this link, you will see the following:
Here, you must enter your username. Remember that the username is the email address you provided to our administrative team. If you don’t remember it, you can always check with technical support.
Next, you will receive an email with a password creation link from the email address noreply@ideastatica.com. Please check your spam folder. If you don’t receive any email, contact us by creating a ticket on our Zendesk platform. Once you access the password creation link, you will see a screen like the following.
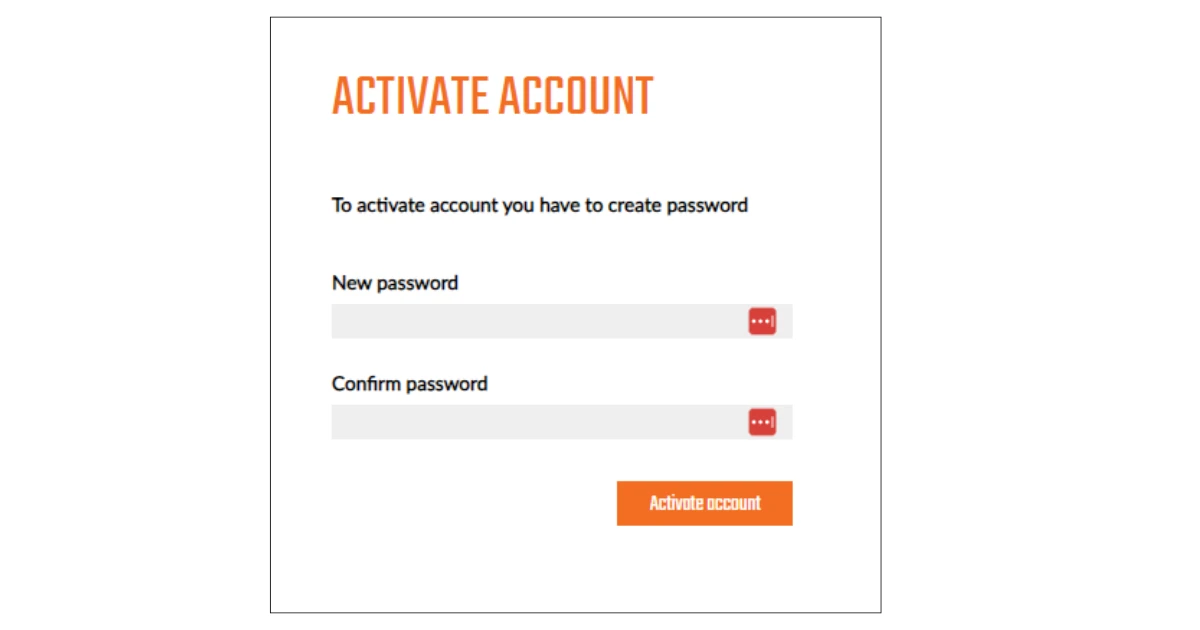
IMPORTANT: If the email you provided to our administrative team was the one you used to test the software, then you already have a username and password. For your convenience, we will not change this access; it will remain the same. We will only assign the license to that email.
IDEA StatiCa License Management
Now that we have an administrator set up for the license, we will proceed to register your work team, allowing you to distribute work more efficiently and fully leverage your license’s potential. First, we will visit our User Portal, which you can access by clicking here Dashboard | IDEA StatiCa. This will take you to the following screen.
Here, you must enter your username and password. Remember you will use the administrator user previously activated. Additionally, you can always access this login by going to the IDEA StatiCa website - IDEA StatiCa - Structural Design Software for Steel and Concrete
Next, you will see your license panel, which is divided into two areas with different information.
These areas are:
Navigation menu.
Detailed information of the current menu (Image 5 shows the Dashboard of your license).
Now, we will review each of the sections available within our IDEA StatiCa license in detail.
Dashboard
In this tab, we can view information about our IDEA StatiCa license.
Here, you can see the following information.
Account name: The company name will appear here.
Account email: The email address of our account will appear here. This is not necessarily a user’s email but the one IDEA StatiCa will use to send important information.
Available product licenses: Here you can see the products and modules you currently have.
License expiration date: You can see your license expiration date here. If your license is permanent, this date will be set far in the future.
Seats used: Quickly see how many seats your license has and how many are currently in use. For example, if it shows 2/5, it means that out of 5 available seats, 2 are being used at the moment.
Reseller name: You can see the name of the reseller with whom you contracted your license, in your case CONSTRUSOFT.
Reseller email: Another way to communicate with your reseller is provided here. However, remember that the preferred channel for technical support is creating a ticket on our Zendesk platform.
Reseller phone number: Another communication channel with your reseller is available here, but the preferred method for technical support is creating a ticket on our Zendesk platform.
Download link for the new version of IDEA StatiCa: Here you can find the installer file for the software.
Account details
In this tab, we can configure or view the information assigned to our license.
Account name: This is the name of the account to which our license is assigned.
Parent account name: This is the name of the parent account to which our account belongs, for example, if we belong to a subdivision of a very large company where each department has separately contracted licenses.
Tax ID: This is the tax identifier.
VAT ID: This is the VAT identification number.
General email: This is the email where general communication from IDEA StatiCa will be sent.
Phone: This is the phone number where you will be contacted by phone.
Billing email: Invoices for the software will be sent to this email.
Licensing email: This is the main email for license communications.
Shipping address: This is the address we have for sending correspondence.
Billing address: This is the address where billing will be sent.
Reseller name: Shows the name of your license reseller (in your case, CONSTRUSOFT).
Reseller email: Email address for communication with the reseller.
Reseller phone number: Phone number for communication with the reseller.
Consultant name: Name of the person responsible for your IDEA StatiCa account on our side.
Consultant email: Email of the person responsible for your IDEA StatiCa account on our side.
Remember to save any changes by clicking the "SAVE CHANGES" button.
License
In this tab, we have a dropdown list to access three points.
Details
In this tab, we have two work areas.
-
License information: Here you can see more information about your license.
Image 9: License information in the Details tab Activations: This field shows the number of workstations you currently have compared to those being used. For example, 3/5 means you have 5 workstations, of which 3 are in use.
License identifier: This unique number is your license ID, which you can use to verify ownership with authorities.
Expiration date: The date shown here is when this license will no longer be valid if it is a subscription.
Maintenance renewal date: For those with a permanent license, this is the date you must renew your license maintenance to stay updated.
Maintenance expiration date: Unlike the previous date, this shows until when you will have technical support and updates if you choose not to pay for maintenance anymore.
-
Check interval: This field is important if you want to use the license without internet access. The check interval is the time the software can operate without accessing the internet to verify the license. The range is from 1 to 1000 hours, with a default set to 72 hours.
Always remember to save changes by clicking "SAVE CHANGES."
-
Products: In this area, you can see the type of license and versions currently active.
Image 10: Available products in the Details tab Here you can see the type of license you have available, with a total of 4 licenses.
Complete: Full license that includes all IDEA StatiCa modules.
Steel: License that only contains the Connection and Member modules.
Concrete: This license includes all concrete applications: Detail, RCS, Beam, Section, Member.
Detail: This license only includes the IDEA StatiCa Detail application for concrete.
Additionally, some other license types may be available:
Trial: Trial license that cannot be used for professional projects.
Educational: License available for students who want to learn the software at an educational institution.
Basic: This license is of interest to readers of this article, as it has no additional cost but allows use of IDEA StatiCa Checkbot. It can be seen as an export license, which internal or external engineers can use to export projects from third-party software to IDEA StatiCa without incurring additional costs.
In this part of the window, you can access additional information by clicking "Show Detail."
Image 11: Details window of current license usage Username: This line shows the usernames of users currently occupying a license seat.
First name: This line shows the first names of users currently occupying a license seat.
Last name: This line shows the last names of users currently occupying a license seat.
Expiration date: Here you can see when the license will expire for the user currently using it, which is the last renewal date plus the check interval (explained above). This lets you know until when the license will remain reserved without being automatically released.
Last license renewal: This line shows the last time the user validated their license online.
Computer name: You can see from which computer the license is currently being used.
Hardware ID: Unique identifier of the hardware of the computer currently using the license.
Product version: The IDEA StatiCa software version from which the license was accessed.
Keep products reserved: This option must be activated if you want to maintain the license without internet access. Here you can see if the user currently using the license has this field enabled or disabled.
All this information helps you stay up to date with license usage by the users you have registered.
Users
In this tab, you can create and manage all users of your license. It is important to note that each license allows the creation of 7 users, including administrator users, so keep this number in mind.
This tab is divided into two areas.
-
User creation/migration tab: This dropdown menu has two options.
Image 13: User creation menu -
Migrate user: If the user is already created but is on another license, for example, a trial license, you can migrate that user to your license here. Clicking this option opens a popup where you can enter the email address of the user you want to migrate.
Image 14: User migration menu It is important to note the message in this menu: after entering the username, the user will receive an email from IDEA StatiCa with a confirmation link for this migration. The user must accept the migration for the user to appear in your license.
-
Create new user: Clicking this option allows you to create a new user by filling out the form that appears in the user portal.
Image 15: User creation window In this window, you must enter the following data.
Username: This is the email address with which you want to register the user.
First name: User’s first name.
Last name: User’s last name.
Administrator: This option grants administrator permissions to the user. Note that this allows the user to create new users or edit license properties.
Always remember to save changes after filling in the fields. Once saved, the user will receive an email from IDEA StatiCa with a link to set their user password.
NOTE: If an error occurs when creating a user, it is likely that the user already exists in the license or has another license assigned. We recommend using the migration process described above. If the problem persists, please create a ticket on our Zendesk platform.
-
-
License users list: In this part of the window, you can see the current users of the license and perform actions on them. First, let’s see what information is available.
Image 16: List of users created in the license In this list, you can see the following information.
Username: Email address of the created user.
Full name: Full name of the created user.
Last activation: The last time this user used the license.
Creation date: The date this user was registered in the license.
User role: Here you can see two tags indicating the user’s role: administrator role
and user role without administrator permissions
. There can be more than one user with administrator permissions.
-
Action: Dropdown menu that allows you to perform actions on the selected user. This menu has the following options.
Image 17: Action menu for the user This menu includes the following options.
-
Edit: This action allows you to edit the user. A menu similar to Image 15 will open, where you can edit the user’s first name, last name, and administrator permissions.
Image 18: User edit menu You cannot edit the username; to change it, you would need to create a new user.
-
Delete: This option deletes the user from your license and will display a confirmation menu before deleting the user.
Image 19: Confirmation menu for deleting a user It is important to note that you should not delete a user to remove them from the license. If you do, the user will retain the license seat, and you will have to wait for the license to be automatically released or for the user to close the software if the "Keep products reserved" option is disabled.
Note: If you experience issues with a user stuck on the license, please create a ticket on our Zendesk platform.
-
Deactivate: Unlike Delete, this option suspends a user but does not remove them from your license. You can reactivate them later. This command is useful if you need to activate and deactivate users from different work teams. A confirmation menu for deactivation will also appear.
Image 20: User deactivation confirmation menu It is important to note that you should not deactivate a user to remove them from the license. If you do, the user will retain the license seat, and you will have to wait for the license to be automatically released or for the user to close the software if the "Keep products reserved" option is disabled.
Note: If you experience issues with a user stuck on the license, please create a ticket on our Zendesk platform.
-
Reset password: This option allows you to set a password you choose for a selected user. Clicking it will display the following menu.
Image 21: Password reset menu In this dropdown window, you must create the new password and will have the option to copy it to send to the user.
-
Analytics
In this menu, you can see important data about your license usage. Only users with administrator permissions have access to this menu. It includes the following three information areas.
-
Sessions: Here you can see how many times users have taken one of the license workstations. This is the count of times the seat was obtained; otherwise, it is recorded as a Clash.
Image 23: License sessions graph You can change the date range and discretize how much time the sessions show.
Hovering over the bars shows the specific number of sessions.
-
Clashes: This is the number of times a user tried to start the software but all seats were currently occupied. This data is important as it helps monitor if more seats are needed in your license.
Image 24: License clashes graph You can select the range for which you want to see license clashes.
-
Report: If you want to see raw data of sessions or clashes, you can export it here as a .csv file.
Image 25: Menu to generate license data report Select the data range (year, month, or day) and click "Generate Report" to download the .csv file.
Cases
This menu tab lets you view the status of your support cases with IDEA StatiCa or create a new case. We will not go into detail here since the best way to contact technical support is through our Zendesk platform. Cases can be created from this tab, but the process creates a request ticket to IDEA StatiCa that is then sent to us. It is more efficient to submit tickets directly on our Zendesk for faster and more timely support.
Courses
In this tab, you will find two options showing the courses currently available for learning the software.
-
E-learning Courses
Here you can see a list of free courses to learn how to use the software for both steel and concrete. These courses are only available in English, and a fee applies to obtain a completion certificate. All users will have access, but we recommend taking our courses Theory and Calculation of Steel Connections | Construsoft and Calculation of Reinforced Concrete Elements | Construsoft.
Image 28: E-learning courses tab -
Training Courses
If you have contracted a personalized training course with IDEA StatiCa, you can see it here. Note that this service can be contracted directly with us but will not appear in this tab.
Image 29: Training courses tab
Web Applications
Finally, we have our last two options. These two applications are completely free and run in your browser, so no software download is needed. Although not the focus of this article, we will briefly explain each.
Connection Library
This application gives access to a library of over 1 million connections made in IDEA StatiCa, accessible for free from the following menu, which appears when you click "Connection Library."
Viewer
This free application allows you to access a web viewer for IDEA StatiCa where you can display and analyze IDEA StatiCa models from a geometric perspective.
With this, we conclude the license management guide. We hope this article is useful and that you refer to it whenever you want to change any settings within your license. Our goal is always to give the customer control over their own license.
See you in other articles.
Comments
0 comments
Article is closed for comments.